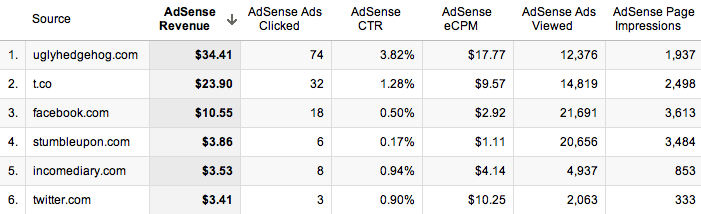
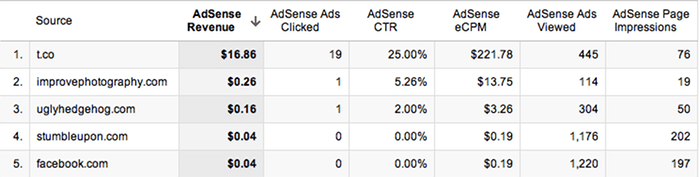
#1 - Target Your Content to an Audience Likely to Share
When strategizing about who you're writing for, consider that audience's ability to help spread the word. Some readers will naturally be more or less active in evangelizing the work you do, but particular communities, topics, writing styles and content types regularly play better than others on the web. For example, great infographics that strike a chord (
like this one), beautiful videos that tell a story (
like this one) and remarkable collections of facts that challenge common assumptions (
like this one) are all targeted at audiences likely to share (geeks with facial hair, those interested in weight loss and those with political thoughts about macroeconomics respectively).
If you can identify groups that have high concentrations of the blue and orange circles in the diagram above, you dramatically improve the chances of reaching larger audiences and growing your traffic numbers. Targeting blog content at less-share-likely groups may not be a terrible decision (particularly if that's where you passion or your target audience lies), but it will decrease the propensity for your blog's work to spread like wildfire across the web.
#2 - Participate in the Communities Where Your Audience Already Gathers
Advertisers on Madison Avenue have spent billions researching and determining where consumers with various characteristics gather and what they spend their time doing so they can better target their messages. They do it because reaching a group of 65+ year old women with commercials for extreme sports equipment is known to be a waste of money, while reaching an 18-30 year old male demographic that attends rock-climbing gyms is likely to have a much higher ROI.
Thankfully, you don't need to spend a dime to figure out where a large portion of your audience can be found on the web. In fact, you probably already know a few blogs, forums, websites and social media communities where discussions and content are being posted on your topic (and if you don't a Google search will take you much of the way). From that list, you can do some easy expansion using a
web-based tool like Google's Display Planner:

Once you've determined the communities where your soon-to-be-readers gather, you can start participating. Create an account, read what others have written and don't jump in the conversation until you've got a good feel for what's appropriate and what's not. I've
written a post here about rules for comment marketing, and all of them apply. Be a good web citizen and you'll be rewarded with traffic, trust and fans. Link-drop, spam or troll and you'll get a quick boot, or worse, a reputation as a blogger no one wants to associate with.
#3 - Make Your Blog's Content SEO-Friendly
Search engines are a massive opportunity for traffic, yet many bloggers ignore this channel for a variety of reasons that usually have more to do with fear and misunderstanding than true problems. As I've written before, "
SEO, when done right, should never interfere with great writing." In 2014, Google will see over 6 billion daily searches from around the world, and that number is only growing:

Taking advantage of this massive traffic opportunity is of tremendous value to bloggers, who often find that much of the business side of blogging, from inquiries for advertising to guest posting opportunities to press and discovery by major media entities comes via search.
SEO for blogs is both simple and easy to set up, particularly if you're using an SEO-friendly platform like Wordpress, Drupal or Joomla. For more information on how to execute on great SEO for blogs, check out the following resources:
Don't let bad press or poor experiences with spammers (spam is not SEO) taint the amazing power and valuable contributions SEO can make to your blog's traffic and overall success. 20% of the effort and tactics to make your content optimized for search engines will yield 80% of the value possible; embrace it and thousands of visitors seeking exactly what you've posted will be the reward.
#4 - Use Twitter, Facebook and Google+ to Share Your Posts & Find New Connections
Twitter has
271 million active users every month. Facebook has
over 1 billion active users. Google+ has
over 300 million. LinkedIn is
over 300 million. Together, these networks are attracting vast amounts of time and interest from Internet users around the world, and those that participate on these services fit into the "content distributors" description above, meaning they're likely to help spread the word about your blog.
Leveraging these networks to attract traffic requires patience, study, attention to changes by the social sites and consideration in what content to share and how to do it. My advice is to use the following process:
- If you haven't already, register a personal account and a brand account at each of the following - Twitter, Facebook, Google+ and LinkedIn (those links will take you directly to the registration pages for brand pages). For example, my friend Dharmesh has a personal account for Twitter and a brand account for OnStartups (one of his blog projects). He also maintains brand pages on Facebook, LinkedIn and Google+.
- Fill out each of those profiles to the fullest possible extent - use photos, write compelling descriptions and make each one as useful and credible as possible. Research shows that profiles with more information have a significant correlation with more successful accounts (and there's a lot of common sense here, too, given that spammy profiles frequently feature little to no profile work).
- Connect with users on those sites with whom you already share a personal or professional relationships, and start following industry luminaries, influencers and connectors. Services like FollowerWonk and CircleCount can be incredible for this:

- Start sharing content - your own blog posts, those of peers in your industry who've impressed you and anything that you feel has a chance to go "viral" and earn sharing from others.
- Interact with the community - use hash tags, searches and those you follow to find interesting conversations and content and jump in! Social networks are amazing environment for building a brand, familiarizing yourself with a topic and the people around it, and earning the trust of others through high quality, authentic participation and sharing
If you consistently employ a strategy of participation, share great stuff and make a positive, memorable impression on those who see your interactions on these sites, your followers and fans will grow and your ability to drive traffic back to your blog by sharing content will be tremendous. For many bloggers, social media is the single largest source of traffic, particularly in the early months after launch, when SEO is a less consistent driver.
#5 - Install Analytics and Pay Attention to the Results
At the very least, I'd recommend most bloggers install
Google Analytics (which is free), and watch to see where visits originate, which sources drive quality traffic and what others might be saying about you and your content when they link over. If you want to get more advanced, check out this post on
18 Steps to Successful Metrics and Marketing.
Here's a screenshot from the analytics of
my wife's travel blog, the Everywhereist:
As you can see, there's all sorts of great insights to be gleaned by looking at where visits originate, analyzing how they were earned and trying to repeat the successes, focus on the high quality and high traffic sources and put less effort into marketing paths that may not be effective. In this example, it's pretty clear that Facebook and Twitter are both excellent channels. StumbleUpon sends a lot of traffic, but they don't stay very long (averaging only 36 seconds vs. the general average of 4 minutes!).
Employing analytics is critical to knowing where you're succeeding, and where you have more opportunity. Don't ignore it, or you'll be doomed to never learn from mistakes or execute on potential.
#6 - Add Graphics, Photos and Illustrations (with link-back licensing)
If you're someone who can produce graphics, take photos, illustrate or even just create funny doodles in MS Paint, you should leverage that talent on your blog. By uploading and hosting images (or using a third-party service like
Flickr or
Niice to embed your images with licensing requirements on that site), you create another traffic source for yourself via Image Search, and often massively improve the engagement and enjoyment of your visitors.
When using images, I highly recommend creating a way for others to use them on their own sites legally and with permission, but in such a way that benefits you as the content creator. For example, you could have a consistent notice under your images indicating that re-using is fine, but that those who do should link back to this post. You can also post that as a sidebar link, include it in your terms of use, or note it however you think will get the most adoption.
Some people will use your images without linking back, which sucks. However, you can find them by employing the
Image Search function of "similar images," shown below:
Clicking the "similar" link on any given image will show you other images that Google thinks look alike, which can often uncover new sources of traffic. Just reach out and ask if you can get a link, nicely. Much of the time, you'll not only get your link, but make a valuable contact or new friend, too!
#7 - Conduct Keyword Research While Writing Your Posts
Not surprisingly, a big part of showing up in search engines is targeting the terms and phrases your audience are actually typing into a search engine. It's hard to know what these words will be unless you do some research, and luckily, there's a free tool from Google to help called the
AdWords Keyword Planner.
Type some words at the top, hit search and AdWords will show you phrases that match the intent and/or terms you've employed. There's lots to play around with here, but watch out in particular for the keyword filters, keyword options, and include/exclude features:

When you choose "exact match" AdWords will show you only the quantity of searches estimated for that precise phrase. If you use broad match, they'll include any search phrases that use related/similar words in a pattern they think could have overlap with your keyword intent (which can get pretty darn broad). "Phrase match" will give you only those phrases that include the word or words in your search - still fairly wide-ranging, but between "exact" and "broad."
I also use and recommend
Keywordtool.io, which mines keywords from Google's Suggest function:

When you're writing a blog post, keyword research is best utilized for the title and headline of the post. For example, if I wanted to write a post here on Moz about how to generate good ideas for bloggers, I might craft something that uses the phrase "blog post ideas" or "blogging ideas" near the front of my title and headline, as in "Blog Post Ideas for When You're Truly Stuck," or "Blogging Ideas that Will Help You Clear Writer's Block."
Optimizing a post to target a specific keyword isn't nearly as hard as it sounds. 80% of the value comes from merely using the phrase effectively in the title of the blog post, and writing high quality content about the subject. If you're interested in more, read
Perfecting Keyword Targeting and On-Page Optimization.
#8 - Frequently Reference Your Own Posts and Those of Others
The web was not made for static, text-only content! Readers appreciate links, as do other bloggers, site owners and even search engines. When you reference your own material in-context and in a way that's not manipulative (watch out for over-optimizing by linking to a category, post or page every time a phrase is used - this is almost certainly discounted by search engines and looks terrible to those who want to read your posts), you potentially draw visitors to your other content AND give search engines a nice signal about those previous posts.
Perhaps even more valuable is referencing the content of others. The biblical expression "give and ye shall receive," perfectly applies on the web. Other site owners will often receive
Google Alerts (or, if they're using Moz, they might get
Fresh Alerts :-) ) or look through their incoming referrers (as I showed above in tip #5) to see who's talking about them and what they're saying. Linking out is a direct line to earning links, social mentions, friendly emails and new relationships with those you reference. In its early days, this tactic was one of the best ways we earned recognition and traffic with the Moz blog and the power continues to this day.
#9 - Participate in Social Sharing Communities Like Reddit + StumbleUpon
The major social networking sites aren't alone in their power to send traffic to a blog. Social community sites like
Reddit (which now receives
more than 2 billion! with a "B"! views each month),
StumbleUpon,
Pinterest,
Tumblr,
Care2 (for nonprofits and causes),
GoodReads (books),
Ravelry (knitting), Newsvine (news/politics) and many, many more (Wikipedia maintains a decent, though not comprehensive list
here).
Each of these sites have different rules, formats and ways of participating and sharing content. As with participation in blog or forum communities described above in tactic #2, you need to add value to these communities to see value back. Simply drive-by spamming or leaving your link won't get you very far, and could even cause a backlash. Instead, learn the ropes, engage authentically and you'll find that fans, links and traffic can develop.
These communities are also excellent sources of inspiration for posts on your blog. By observing what performs well and earns recognition, you can tailor your content to meet those guidelines and reap the rewards in visits and awareness. My top recommendation for most bloggers is to at least check whether there's an appropriate subreddit in which you should be participating.
Subreddits and their
search function can help with that.
#10 - Guest Blog (and Accept the Guest Posts of Others)
When you're first starting out, it can be tough to convince other bloggers to allow you to post on their sites OR have an audience large enough to inspire others to want to contribute to your site. This is when friends and professional connections are critical. When you don't have a compelling marketing message, leverage your relationships - find the folks who know you, like you and trust you and ask those who have blog to let you take a shot at authoring something, then ask them to return the favor.
Guest blogging is a fantastic way to spread your brand to new folks who've never seen your work before, and it can be useful in earning early links and references back to your site, which will drive direct traffic and help your search rankings (diverse, external links are a key part of
how search engines rank sites and pages). Several recommendations for those who engage in guest blogging:
- Find sites that have a relevant audience - it sucks to pour your time into writing a post, only to see it fizzle because the readers weren't interested. Spend a bit more time researching the posts that succeed on your target site, the makeup of the audience, what types of comments they leave and you'll earn a much higher return with each post.
- Don't be discouraged if you ask and get a "no" or a "no response." As your profile grows in your niche, you'll have more opportunities, requests and an easier time getting a "yes," so don't take early rejections too hard and watch out - in many marketing practices, persistence pays, but pestering a blogger to write for them is not one of these (and may get your email address permanently banned from their inbox).
- When pitching your guest post make it as easy as possible for the other party. When requesting to post, have a phenomenal piece of writing all set to publish that's never been shared before and give them the ability to read it. These requests get far more "yes" replies than asking for the chance to write with no evidence of what you'll contribute. At the very least, make an outline and write a title + snippet.
- Likewise, when requesting a contribution, especially from someone with a significant industry profile, asking for a very specific piece of writing is much easier than getting them to write an entire piece from scratch of their own design. You should also present statistics that highlight the value of posting on your site - traffic data, social followers, RSS subscribers, etc. can all be very persuasie to a skeptical writer.
Be aware that Google's recently
cracked down on guest blog posts and guest blog tools that focus exclusively on attracting links. While links can be a nice byproduct of a relevant, useful, and high quality contribution to another site, it can look very fishy to Google if all your links are coming from guest contributions that appear to have little relevance and low quality. Moz's Jen Lopez wrote an
excellent summation of the new rules for guest posting here.
Twitter, Facebook, LinkedIn and Google+ are also great places to find guest blogging opportunities. In particular, check out the profiles of those you're connected with to see if they run blogs of their own that might be a good fit.
Google's Blog Search function and services like
BuzzSumo or
Fresh Web Explorer are also solid tools for discovery.
#11 - Incorporate Great Design Into Your Site
The power of beautiful, usable, professional design can't be overstated. When readers look at a blog, the first thing they judge is how it "feels" from a design and UX perspective. Sites that use default templates or have horrifying, 1990's design will receive less trust, a lower time-on-page, fewer pages per visit and a lower likelihood of being shared. Those that feature stunning design that clearly indicates quality work will experience the reverse - and reap amazing benefits.

These threads -
1,
2,
3 and
4 - feature some remarkable blog designs for inspiration
If you're looking for a designer to help upgrade the quality of your blog, there's a few resources I recommend:
- Dribbble - great for finding high quality professional designers
- Forrst - another excellent design profile community
- Behance - featuring galleries from a wide range of visual professionals
- Sortfolio - an awesome tool to ID designers by region, skill and budget
- 99 Designs - a controversial site that provides designs on spec via contests (I have mixed feelings on this one, but many people find it useful, particularly for budget-conscious projects)
This is one area where budgeting a couple thousand dollars (if you can afford it) or even a few hundred (if you're low on cash) can make a big difference in the traffic, sharing and viral-impact of every post you write.
#12 - Interact on Other Blogs' Comments
As bloggers, we see a lot of comments. Many are spam, only a few add real value, and even fewer are truly fascinating and remarkable. If you can be in this final category consistently, in ways that make a blogger sit up and think "man, I wish that person commented here more often!" you can achieve great things for your own site's visibility through participation in the comments of other blogs.
Combine the tools presented in #10 (particularly
FWE) and #4 (especially
FollowerWonk) for discovery. The feed subscriber counts in Google Reader can be particularly helpful for identifying good blogs for participation. Then apply the principles covered in
this post on comment marketing.
Do be conscious of the name you use when commenting and the URL(s) you point back to. Consistency matters, particularly on naming, and linking to internal pages or using a name that's clearly made for keyword-spamming rather than true conversation will kill your efforts before they begin.
#13 - Participate in Q+A Sites
Every day, thousands of people ask questions on the web. Popular services like
Yahoo! Answers,
Answers.com,
Quora,
StackExchange,
Formspring and more serve those hungry for information whose web searches couldn't track down the responses they needed.
The best strategy I've seen for engaging on Q+A sites isn't to answer every question that comes along, but rather, to strategically provide high value to a Q+A community by engaging in those places where:
- The question quality is high, and responses thus far have been thin
- The question receives high visibility (either by ranking well for search queries, being featured on the site or getting social traffic/referrals). Most of the Q+A sites will show some stats around the traffic of a question
- The question is something you can answer in a way that provides remarkable value to anyone who's curious and drops by
I also find great value in answering a few questions in-depth by producing an actual blog post to tackle them, then linking back. This is also a way I personally find blog post topics - if people are interested in the answer on a Q+A site, chances are good that lots of folks would want to read it on my blog, too!
Just be authentic in your answer, particularly if you're linking. If you'd like to see some examples, I
answer a lot of questions at Quora, frequently include relevant links, but am rarely accused of spamming or link dropping because it's clearly about providing relevant value, not just getting a link for SEO (links on most user-contributed sites are "nofollow" anyway, meaning they shouldn't pass search-engine value). There's a dangerous line to walk here, but if you do so with tact and candor, you can earn a great audience from your participation.
#14 - Enable Subscriptions via Feed + Email (and track them!)
If someone drops by your site, has a good experience and thinks "I should come back here and check this out again when they have more posts," chances are pretty high (I'd estimate 90%+) that you'll never see them again. That sucks! It shouldn't be the case, but we have busy lives and the Internet's filled with animated gifs of cats.
In order to pull back some of these would-be fans, I highly recommend creating an
RSS feed using Feedburner and putting visible buttons on the sidebar, top or bottom of your blog posts encouraging those who enjoy your content to sign up (either via feed, or via email, both of which are popular options).
If you're using Wordpress, there's
some easy plugins for this, too.
Once you've set things up, visit every few weeks and check on your subscribers - are they clicking on posts? If so, which ones? Learning what plays well for those who subscribe to your content can help make you a better blogger, and earn more visits from RSS, too.
#15 - Attend and Host Events
Despite the immense power of the web to connect us all regardless of geography, in-person meetings are still remarkably useful for bloggers seeking to grow their traffic and influence. The people you meet and connect with in real-world settings are far more likely to naturally lead to discussions about your blog and ways you can help each other. This yields guest posts, links, tweets, shares, blogroll inclusion and general business development like nothing else.
I'm a big advocate of
Lanyrd, an event directory service that connects with your social networks to see who among your contacts will be at which events in which geographies. This can be phenomenally useful for identifying which meetups, conferences or gatherings are worth attending (and who you can carpool with).
The founder of Lanyrd also
contributed this great answer on Quora about other search engines/directories for events (which makes me like them even more).
#16 - Use Your Email Connections (and Signature) to Promote Your Blog
As a blogger, you're likely to be sending a lot of email out to others who use the web and have the power to help spread your work. Make sure you're not ignoring email as a channel, one-to-one though it may be. When given an opportunity in a conversation that's relevant, feel free to bring up your blog, a specific post or a topic you've written about. I find myself using blogging as a way to scalably answer questions - if I receive the same question many times, I'll try to make a blog post that answers it so I can simply link to that in the future.
I also like to use my email signature to promote the content I share online. If I was really sharp, I'd do link tracking using a service like Bit.ly so I could see how many clicks email footers really earn. I suspect it's not high, but it's also not 0.
#17 - Survey Your Readers
Web surveys are easy to run and often produce high engagement and great topics for conversation. If there's a subject or discussion that's particularly contested, or where you suspect showing the distribution of beliefs, usage or opinions can be revealing, check out a tool like
SurveyMonkey (they have a small free version) or
PollDaddy.
Google Docs also offers a survey tool that's totally free, but not yet great in my view.
#18 - Add Value to a Popular Conversation
Numerous niches in the blogosphere have a few "big sites" where key issues arise, get discussed and spawn conversations on other blogs and sites. Getting into the fray can be a great way to present your point-of-view, earn attention from those interested in the discussion and potentially get links and traffic from the industry leaders as part of the process.
You can see me trying this out with Fred Wilson's AVC blog last year (an incredibly popular and well-respected blog in the VC world). Fred wrote a post
about Marketing that I
disagreed with strongly and publicly and a day later, he
wrote a follow-up where he included a graphic I made AND a link to my post.
If you're seeking sources to find these "popular conversations,"
Alltop,
Topsy,
Techmeme (in the tech world) and their sister sites
MediaGazer,
Memeorandum and
WeSmirch, as well as
PopURLs can all be useful.
#19 - Aggregate the Best of Your Niche
Bloggers, publishers and site owners of every variety in the web world love and hate to be compared and ranked against one another. It incites endless intrigue, discussion, methodology arguments and competitive behavior - but, it's amazing for earning attention. When a blogger publishes a list of "the best X" or "the top X" in their field, most everyone who's ranked highly praises the list, shares it and links to it. Here's an example from the world of marketing itself:
That's a screenshot of the
AdAge Power 150, a list that's been maintained for years in the marketing world and receives an endless amount of discussion by those listed (and not listed). For example, why is SEOmoz's Twitter score only a "13" when we have so many more followers, interactions and retweets than many of those with higher scores? Who knows. But I know it's good for AdAge. :-)
Now, obviously, I would encourage anyone building something like this to be as transparent, accurate and authentic as possible. A high quality resource that lists a "best and brightest" in your niche - be they blogs, Twitter accounts, Facebook pages, individual posts, people, conferences or whatever else you can think to rank - is an excellent piece of content for earning traffic and becoming a known quantity in your field.
Oh, and once you do produce it - make sure to let those featured know they've been listed. Tweeting at them with a link is a good way to do this, but if you have email addresses, by all means, reach out. It can often be the start of a great relationship!
#20 - Connect Your Web Profiles and Content to Your Blog
Many of you likely have profiles on services like YouTube, Slideshare, Yahoo!, DeviantArt and dozens of other social and Web 1.0 sites. You might be uploading content to Flickr, to Facebook, to Picasa or even something more esoteric like Prezi. Whatever you're producing on the web and wherever you're doing it, tie it back to your blog.
Including your blog's link on your actual profile pages is among the most obvious, but it's also incredibly valuable. On any service where interaction takes place, those interested in who you are and what you have to share will follow those links, and if they lead back to your blog, they become opportunities for capturing a loyal visitor or earning a share (or both!). But don't just do this with profiles - do it with content, too! If you've created a video for YouTube, make your blog's URL appear at the start or end of the video. Include it in the description of the video and on the uploading profile's page. If you're sharing photos on any of the dozens of photo services, use a watermark or even just some text with your domain name so interested users can find you.
If you're having trouble finding and updating all those old profiles (or figuring out where you might want to create/share some new ones),
KnowEm is a great tool for discovering your own profiles (by searching for your name or pseudonyms you've used) and claiming profiles on sites you may not yet have participated in.
I'd also strongly recommend leveraging Google's relatively new protocol for rel=author.
AJ Kohn wrote a great post on how to set it up here, and
Yoast has another good one on building it into Wordpress sites. The benefit for bloggers who do build large enough audiences to gain Google's trust is earning your profile photo next to all the content you author - a powerful markup advantage that likely drives extra clicks from the search results and creates great, memorable branding, too.
#21 - Uncover the Links of Your Fellow Bloggers (and Nab 'em!)
If other blogs in your niche have earned references from sites around the web, there's a decent chance that they'll link to you as well. Conducting competitive link research can also show you what content from your competition has performed well and the strategies they may be using to market their work. To uncover these links, you'll need to use some tools.
OpenSiteExplorer is my favorite, but I'm biased (it's made by Moz). However, it is free to use - if you create a registered account here, you can get unlimited use of the tool showing up to 1,000 links per page or site in perpetuity.
There are other good tools for link research as well, including
Majestic,
Ahrefs and, I've heard that in the near-future,
SearchMetrics.
Finding a link is great, but it's through the exhaustive research of looking through dozens or hundreds that you can identify patterns and strategies. You're also likely to find a lot of guest blogging opportunities and other chances for outreach. If you maintain a great persona and brand in your niche, your ability to earn these will rise dramatically.
Bonus #22 - Be Consistent and Don't Give Up
If there's one piece of advice I wish I could share with every blogger, it's this:
The above image comes from
Everywhereist's analytics. Geraldine could have given up 18 months into her daily blogging. After all, she was putting in 3-5 hours each day writing content, taking photos, visiting sites, coming up with topics, trying to guest blog and grow her Twitter followers and never doing any SEO (don't ask, it's a running joke between us). And then, almost two years after her blog began, and more than 500 posts in, things finally got going. She got some nice guest blogging gigs, had some posts of hers go "hot" in the social sphere, earned mentions on some bigger sites, then got really big press from
Time's Best Blogs of 2011.
I'd guess there's hundreds of new bloggers on the web each day who have all the opportunity Geraldine had, but after months (maybe only weeks) of slogging away, they give up.
When I started the Moz blog in 2004, I had some advantages (mostly a good deal of marketing and SEO knowledge), but it was nearly 2 years before the blog could be called anything like a success. Earning traffic isn't rocket science, but it does take time, perseverance and consistency. Don't give up. Stick to your schedule. Remember that everyone has a few posts that suck, and it's only by writing and publishing those sucky posts that you get into the habit necessary to eventually transform your blog into something remarkable.
Good luck and good blogging from all of us at Moz!